Friday, January 28, 2011

Painting six ways

#1: Drizzle painting: for this I gave them three containers of tempera paint with pipettes.  I used powdered tempera mixed to a consistency thick enough to stick to the paper towels, but thin enough to run down the paper.


This girl was particularly interested in how high up on the paper she could put the paint and get it to still drip on the floor.  (Process!)


The girl who made this painting was persistently trying to make vertical lines; she said to me, in only a slightly exasperated voice, "even when I make lines across, they still drip down." 

#2: Color mixing. This activity is pretty self explanatory, but I cannot say enough about it.  They loved this activity (boys too) and created some fantastic shades.  See at the end of this section for a Bev Bos video that inspired it.  


video:


#3:  Dough Paint:  I found this in the Science Arts book.  The paint is made of equal parts salt, flour, and water, with a little paint added.  The book calls is "Sparkle Dough Paint," but I wouldn't say it actually "sparkles."  None the less it is a fun art activity.  They helped me funnel it into squeeze bottles and off they went.


Most of them chose to do "fold over" paintings, I did not suggest it, but one child did it and it caught on like wildfire.  (The term "Fold Over Painting" is borrowed from Bev Bos.


I love the one above.  It took forever to dry (three days) but I thought it was such a creative use of the materials. 


I love how this one (above) was folded at an angle to make an interesting shape.


#4:  Salad Spinner Art: This is one of everyones' favorite ways to paint at school.  All it takes is some precut paper, some liquid water colors, pipettes, and a salad spinner.  Like most of these painting options- no instructions are needed.


Add as much or as little paint as desired.


Spin for as long and and as fast as desired.


Ta- Da!

#5: Bubble Painting:  Some children a little older than my class did this project and was fascinated by making really cool designs on their paper with the over flowing bubbles but my class wasn't really interested in what was happening to their paper.  They were interested in what was happening in the cup: the bubbles building, the bubbles overflowing, the bubbles popping.  This being said, we switched from paper to paper towels so we could do more bubbles faster and clean up faster.  


#6:  Incline Painting (with cars and marbles!):  This activity was inspired by one of my favorite blogs:  Teacher Tom's Blog.  Now, mine was not as complex as Teacher Tom's, but I am not a builder, or a "tinkerer" or anything of the sort.  


My simple solution was to adjust only one side of our adjustable table.  I put a sensory pan at the bottom to catch the cars and left the roll of paper on the floor by the legs, pulling the paper over the top and cutting it off for the next group.  


This was pretty fun, and kept the boys interest for more than ten minutes!

Thursday, January 27, 2011

That's Hilllllarrrrrrious! (Amazing)

Today I quenched their unquenchable thirst for explosions.  It's the classic film canister explosion.  An alka- seltzer capsule and some water in a film canister, put the top on and BOOM! Explosion. We started one at a time and then two, three, four... up to eight- in a display they called "fireworks."  This was a great chance to talk about air and gases, things they can't see, but can see the proof of in this explosion.  For a slight variation we added lemon juice; This reaction is a lot faster, so you have to cap faster.  It also is more explosive.  We had a few canisters literally doing flips when their tops popped, where as with the water they often stood standing, only sometimes tipping on their side. 


The video below is the fifth time we did this of over fifty times. They laughed and screamed like this every time.  One child kept saying "that's hilllllarrrrrrious!" each time getting a little more excited and saying it a little louder.  This is actually one of the quieter times we did this experiment (some kids were in the bathroom).  


The children put the capsules in and water using the turkey basters, then ran back to their sitting places while I topped and popped them.  I topped them and had them sit for safety reasons.  Once while doing a "fireworks" display of eight, one popped and hit me in the eye while I was still capping the last one.  It hurt quite a bit- not something you want to happen to a little one!


*We also popped packing poppers today, I will load pictures in a new entry later. 

Wednesday, January 26, 2011

A big clean mess

My class has been begging to do cabbage juice experiments ever since we did the project a week ago.  However, I can't really take the smell of cabbage anymore.  It literally has always turned my stomach.  I think it is because I grew up in a rural area and so when I smell cabbage I think of the rotting cabbage field smell?  Anyway, on to more important things.  
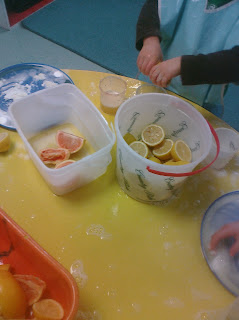
Since cabbage juice is out for at least 3 months (and hopefully they will stop asking by then), I thought a little free experimenting was in order.  So today I loaded up our table with acids and bases:  Lemons (cut in half), medium grape fruits (cut in quarters), baking soda, alka seltzer tablets, dish soap, and water. With these things, surely any child can create a potion to suit their fancy, and as a matter of fact they made not one, but at least 5 each.  


Lemons are actually the most acidic citrus fruit followed by limes and the grapefruit.  The beautiful thing about the grapefruit is that they are so easy to squeeze and have a ton of juice in them. The reason for giving them the actual fruit is that, to me, it makes it more real when they actually see it coming out of the fruit.  Squeezing also slows them down, so in theory they are able to take in more of what is happening, and also is a great motor exercise; They really have to use those little hand muscles on the lemons!
They went through many grapefruit and lemons in this experiment. 


I had assumed that they would be more likely to use lemons, since they would yield a greater reaction but they seemed to prefer the grapefruit for two reasons. First, the grapefruit (as I said earlier) were easier to squeeze juice from, and second, like most 4 year olds they have small "boo-boos" on their hands and they found that the grapefruit didn't sting their boo-boos like the lemon did.  


In any case, they were able to create a wide variety of reactions (and "potions").  

This was probably one of the best reactions we had: a little baking soda, some soap and a big squeeze of lemon, it eventually overflowed the container.


I think this one had three or four alka seltzer, water, soap, baking soda, and maybe a pinch of grapefruit juice
One little girl was working on a cup that was not really reacting beyond a few bubbles no matter how many alka seltzer tablets she put in.  You can see here that when she dumped it on a top the alka seltzer were still whole, protected in a layer of baking soda and soap.  (In this mixture there was only water, dish soap, baking soda and alka seltzer).


You can see that once she added lemon juice several things began to happen: the baking soda bubbled, the alka seltzer began to dissolve, and swirling patterns emerged in the liquid resulting from the reactions.


One child put an alka seltzer tablet on the grapefruit and on the lemon and then gave them each a little squeeze.  The one on the lemon dissolved first, as you might imagine.  


After they had successfully used all available cups and containers  and neutralized almost everything, they were content to just mix their potions with each other, pouring them back and forth and adding water and baking soda, (the only things left from the 2 dozen lemons and dozen grapefruit), stirring, and pouring some more.  To get water, by the way, they used turkey basters instead of pipettes- allowing them to use more at once.  The basters also became instrumental in transferring liquids between cups for them and doubled as stirring utensils.  I got this idea from somebody's   blog but I cannot remember to whom the blog belonged, so if it belonged to you- let me know and I will link you to this entry.  


They really enjoyed this experiment, (although maybe not quite as much as cabbage juice).  One child did ask me if they could have the vinegar (remembering the power of the vinegar from the last experiment, no doubt).  However, because vinegar is much better suited for outdoors science projects, and because we were out of vinegar thanks to the cabbage project, they made do with the lemon juice.  


**Another really awesome thing about this project is that between the lemon, baking soda and soap, it makes any room smell amazing! It is a welcome change from cabbage juice.  Those three ingredients are also great for cleaning, so the table and floor that the project is on will clean up beautifully- it actually took  a couple of stains off the table that ordinarily I would use Commet for when the kids weren't around.  :-)

Tuesday, January 25, 2011

This is like a dream! (The real winter wonderland)

Today we FINALLY had a good day to go outside! With at least four inches of snow on the ground and the tropic temperature of 28 degrees, it was a perfect day to take on the big outdoors. 


Upon going outside and taking one trip down the hill Trisha said to me "this is like a dream!"  She's right, it was. 


One of the best things, I believe about school, is the little hill in the back. There is nothing better then sledding out there on a winter day.


Most of them could spend all day just sledding.  No snowmen, no snow balls, just sledding.  Many of us adults can remember sledding as a child and I personally cannot remember many things that were much more fun than that.


 They have become experts on creating trails for themselves (and I think we have only been sledding maybe ten times this winter).  Sledding on their stomachs was new for most of them today.  Many of them were too afraid of the risk previously and preferred to remain seated on our "sleds," (kitchen trays), to sliding on their stomachs.  


climbing up the hill on hands and knees 


What I love about sledding is also that it is an experiment in traction and friction for them.  They learn (slowly) not to climb up the trails that they have made not only because the trails are slippery to climb up, but also because when they climb up them it makes bumps in the trail and so they are slowed down when sledding down the hill.  


Here you can see them traveling in groups up the hill away from the trails, using their trays as ice picks to prevent them from sliding.


Eventually, after a half an hour of sledding down the big hill they decided to try the little hill that forms a miniature valley with the adjoining large hill.  


creating a trail

Without being asked, when friends noticed Trisha working on this interesting project, they rushed over to help and collaborate.


They were successful in creating a trail on the small hill, of course, but being so short, and requiring a lot more scooting and less sliding because of the very gradual incline, as soon as it was accomplished, they moved on. 


We did have a couple children who tried to mold snow in bowls and buckets, but the snow was not the right consistency to mold, so they only made a few bowl molds.  


Happy sledding. :-)


The evolution of paintings and the painter

Admittedly, I did not know that much when I first starting teaching.  I made a lot of mistakes, and learned a lot along the way. (To be fair to myself I had a lot of good instincts and completed each year far above just survival).  Still, looking back, I wish I had known what I know now, and I am sure that as time goes on I will wish that again for the present time.


When I first started teaching I could not figure out why most of the paintings my students made looked something like this:


These paintings are actually a little more colorful and imaginative than most of the others I had back then.  Every time I "let them" paint, this is what they made: brown pictures, or various shades of brownish- blackish green pictures, usually covered with paint coast to coast.  Why?  I could see in their drawing that they had miraculous figures and doodles, but why didn't they translate over to painting?  On one hand, it was okay, because they liked painting and painting is a great art/ sensory/ motor activity.  On the other hand, I couldn't help but feel something was wrong, especially when I saw other teachers had their class creating paintings something like this:


When I broke down and asked a teacher I knew why her children's pictures were different than mine she said that she made them not mix the colors on their paper. There was a voice in my head that said that this could not be right.  Children needed to be able to experiment! They needed to have control over their own creative process.  Still, I didn't know what I was doing wrong.  

I started trying to use water colors; the results for some children seemed "better" but many of the children still ended up making pictures that looked like their other paintings, just watered down.  

My revelation came on a day near a holiday when I had just four children there.  I got out the paints and put them on the table with paper and let them paint; nothing was different... yet.  They asked if they could paint another, and I let them, (still nothing different), but they continued to ask for more paper to paint more and I continued to let them paint.  I let them paint as many pictures as they wanted.  

Then, to my amazement, the figures from their drawings started to appear! They made interesting designs that I had never seen before and experimented with the paint in new ways! Paintings that probably looked something like this:


I am horribly embarrassed by not knowing this when I started teaching, and I wish often that I could go back to that class and LET THEM PAINT!  But, I am sharing this because maybe someone else can learn from it, or maybe someone else made the same mistake.

Two paintings three times a week is not enough.  Children learn through repetition and experimentation (which I knew, but didn't apply to art).  Every time a child steps up to the art supplies they are experimenting.  Every time a child uses a new art supply they have to learn as many possibilities for that art supply that they can.  They can't decide NOT to paint their entire paper brown until they know that mixing all the colors together and rubbing them across the paper makes a brown, crunchy painting.  They cannot create many possibilities until they have made others and eliminated other possibilities as being "undesirable" to themselves.  Every time I put out a new supply, most children make a brown picture or a picture with a lot of mixed colors and a lot of paint.  (In the words of Bev Bos "children need to use too much").  I see this over and over again.  Not only do they learn about the texture of the paint and about color mixing, but they are teaching themselves self regulation.  They are teaching themselves how much paint is "too much,"  that all the colors together make brown, and they don't like brown. Until they decide what they do not want to do, until they have eliminated that possibility, they cannot possibly do anything else... and how could I expect them to? 
The way to teach them how to make purple is not to tell them and then show them, it is to give them the materials, walk away, and let them figure it out for themselves. Furthermore, telling them not to mix colors is cheating them from a learning experience, not teaching them SELF regulation (since the regulation is, after all, being done by the teacher), and I am certain that this can qualify as some sort of torture since we KNOW they are just dying to mix those paints. 
Now that I know this, I do almost every art project at least two days in a row and we have painting or some other new art medium EVERYDAY.  The children can make as many paintings or pictures as time allows for.  I wish I had known this my first few months, so that the children had a FULL YEAR to paint  and create like children ought to be able to.  I cheated them, for months, I cheated them.  In the end, however, it is them I have to thank, for teaching me how to be a better teacher.  


Monday, January 24, 2011

Thinking in and out of the box (day II)

Just a few highlights from Friday...

A good part of the day was spent trying to get away from those darn teachers.


I hear only four year olds could be in that box.  


I don't know how- but somehow two children fit in that itty-bitty box. 


Where are all the children?  I only see one!


There's a few behind the barricade- the rest are in boxes, hiding. 


They created a new barricade- in a circle, for better socialization probably, and on the tile instead of the carpet, for better coloring I think.

They caught me looking at them, so they all ran inside.  


A few boys wanted to play swords with the big wrapping paper rolls, but decided that it wasn't fun to just pretend to hit things, and it wasn't safe to hit their friends: so they stood a box on end- an evil robot that needed to be beaten with "swords" and/ or "sticks." 


A girl or two joined in.


And then moved on to pretending a flattened box was a raft, which she kept "falling" off of, needing to be saved from drowning. 


Darn it, they moved the fortress and built something new while my back was turned. 


It took a joint effort to make this laptop.


"Miss Elizabeth can you tape me in this box and mail me to Florida?"
"Why Florida?"
"I want to go to Disney... but not on ice."